
|
|

|
|
|
|
Welcome to the Australian Ford Forums forum. You are currently viewing our boards as a guest which gives you limited access to view most discussions and inserts advertising. By joining our free community you will have access to post topics, communicate privately with other members, respond to polls, upload content and access many other special features without post based advertising banners. Registration is simple and absolutely free so please, join our community today! If you have any problems with the registration process or your account login, please contact us. Please Note: All new registrations go through a manual approval queue to keep spammers out. This is checked twice each day so there will be a delay before your registration is activated. |
|
|||||||
 |
|
|
Thread Tools | Display Modes |
 06-02-2012, 09:13 PM
|
#1 | ||
|
Regular Member

Join Date: Jun 2007
Location: Mackay, QLD
Posts: 437

|
Had to do this job on the weekend so i thought i would do a write up on how i actually did it for those people that are interested!! Also note i have painted them and greased them a couple of days ago.
So if your ball joints look like this, then chances are they are the original ones fitted from new and NEED replacing. 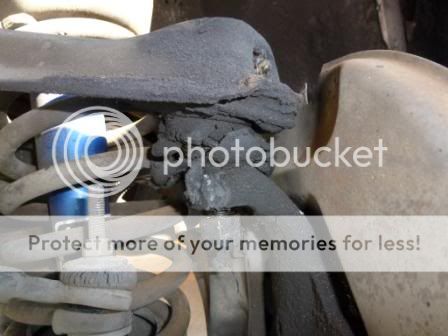 First thing you need to do is jack the vehicle up, put it on stands, remove the wheels and turn the wheel full lock to the side you are repairing. i.e. working on the right hand side turn the wheel full lock to the right. Should end up with this 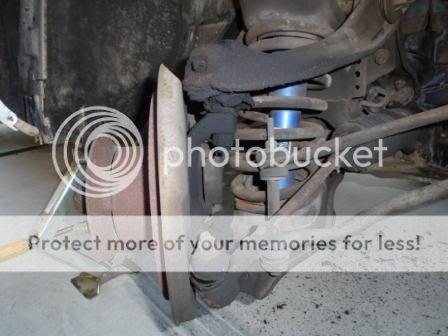 Next using a pair of side cutters or pliers remove the split pins holding the castlated nut in place or like i did just use a 7/8 spanner and sheer them off when undoing the nut, and end up with this 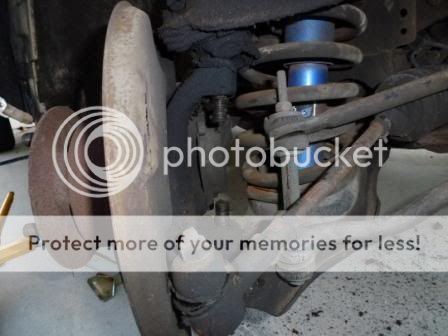 Now looking from the top locate the three rivets that hold the upper ball joint in the upper control arm (this may take a coldchisel and hammer to get through the 38 years worth of crap) they are somewhere there. 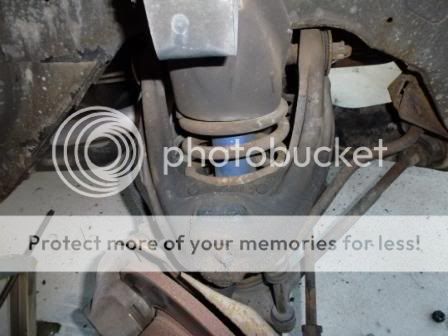 Centre punch them and drill them out using a fiew sizes of drill bits, i think the biggest i used was 9.5mm, it is important to get the hole in the centre of the rivet as this will determin how neat the "cut" is. You also only need to go a couple of mm through the head of the rivet and not all the way through.  Once all three have been drilled (remember that you are only drilling the head of the rivet off and try not to drill into the control arm) grab a punch and give it a fiew good hits 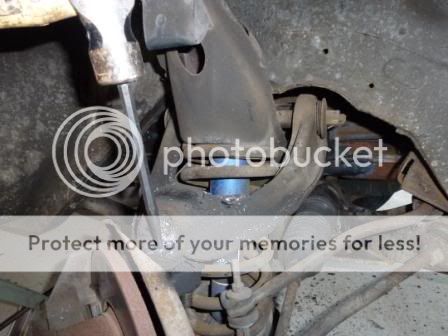 If nothing happens you might have to drill more of the head off or just hit harder. Once you get it to the right depth you should notice the rivet pressing out of the control arm like this 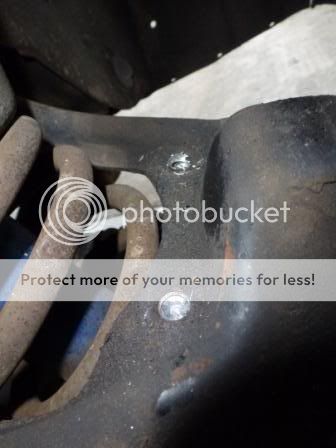 Once you have all the rivets out it should look something like this 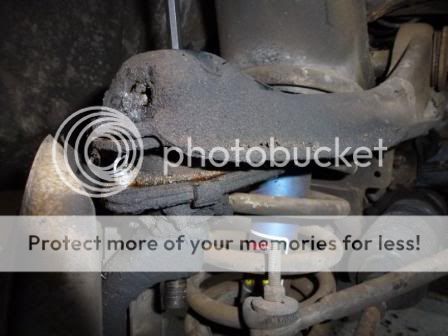 Now get the ball joint removal tool aka the tuning fork, place the flat side against the stub axle and the wedge side against the rubber (or whats left of it) and hit. 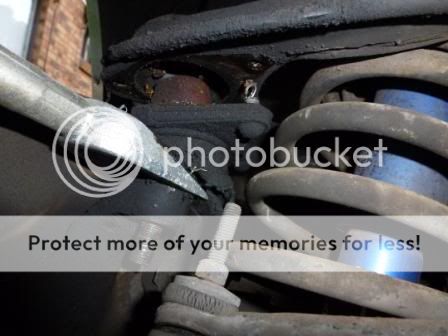 Once it pops free pull the old one out and compare it to the new one to make sure you have the right part  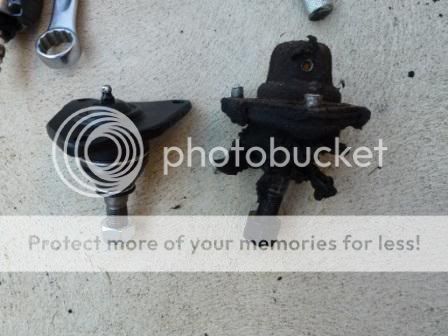 Next the lower ball joint, start by undoing the two bolts that hold the front tie rod thingamajig to the lower control arm,  This is how much mine moved in case anyone was wondering how much spring tension there is 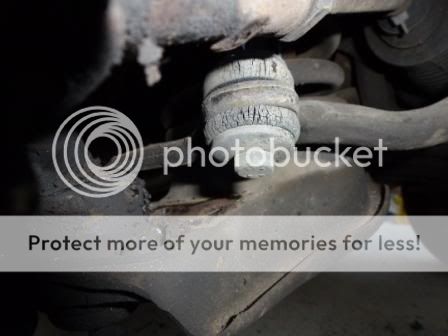 Now move the stub axle around till you have the most room to get to the two rivets, i used a die grinder to flattten the top to get the centre punch in the middle of the rivet and drill the head off the rivets same as the top. 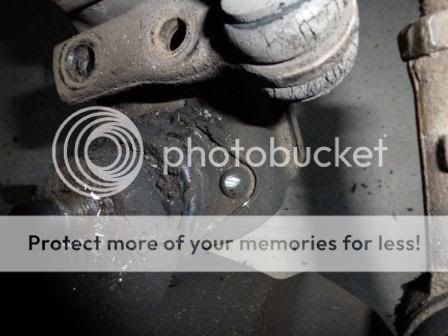 Punch them out untill the ball joint drops from the lower control arm like this  Use the tuning fork again to pop the ball joint out, remembering the flat side goes towards the stub axle. 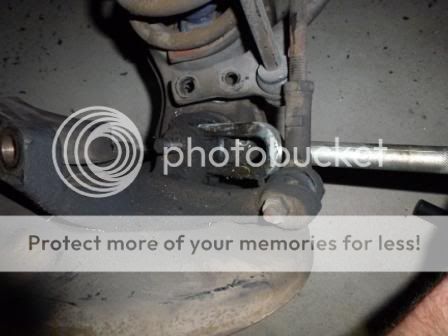 The factory lower ball joint was underneath the lower control arm but it also had the rubber boot on top, they just come apart seperately compared to the replacement one which is one peice. 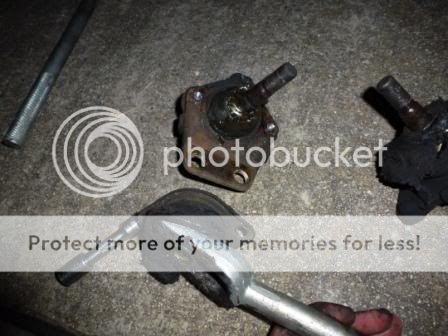 Again compare the two parts to make sure you have the correct bit. 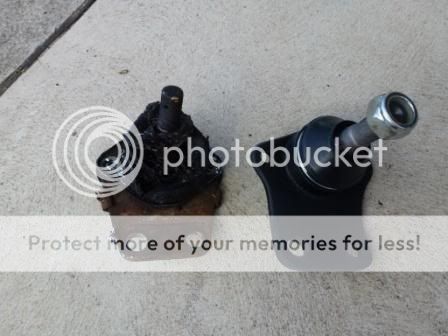 Assembly is the same but backwards, install the lower ball joint using the two supplied bolts but leave them finger tight for now and slip the stub axle over the thread and put the nylok nut on but not tight yet  Do the same for the upper ball joint, leave the three supplied bolts finger tight 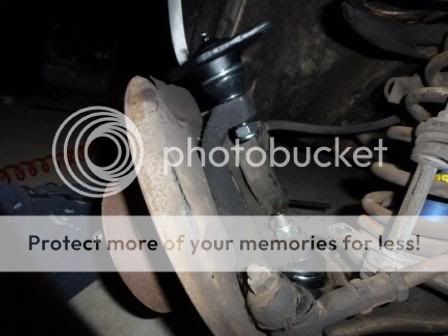 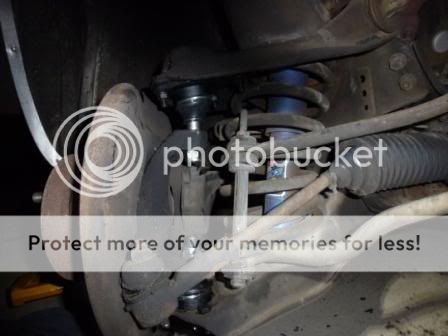 Do up all the small bolts in the upper and lower control arms that were supplied to the correct tension and then do up the two nylok nuts tight!! 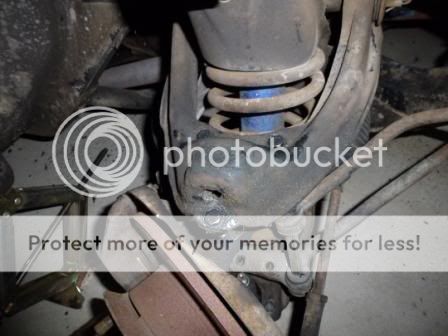 Then comes the fun part of lining up the two remaining bolts that hold the lower control arm and the sway bar and the tie rod, i found it easier to pull the lower control arm forward with one hand and push down on the sway bar link and put the bolt in with the other hand. Dont forget to grease them. 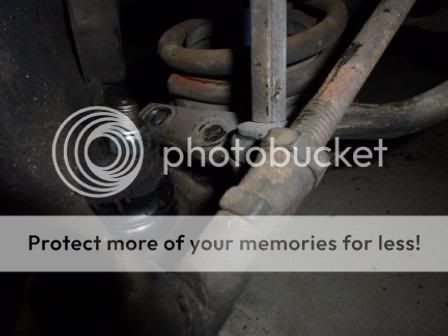 Then put the wheel back on and lower the car and go for a cruise, i mean road test the vehicle. Hope this helps someone Ben
__________________
6.7.2011 |
||

|

|
|
06-02-2012, 10:01 PM
|
#2 | ||
|
Awesome

Join Date: Oct 2007
Location: In my own little world..Everyone here knows me :)
Posts: 9,401

|
Great tutorial on how to replace these. Thanks for sharing
 Cheers Col
__________________
|
||
|
|
|
|
09-02-2012, 09:17 PM
|
#3 | ||
|
FF.Com.Au Hardcore
Join Date: Feb 2009
Posts: 549
|
Excellent tutorial Ben. I was wondering what that tool I have is at the bottom of the tool box.
Cheers, Matt. |
||
|
|
|
|
09-02-2012, 11:14 PM
|
#4 | ||
|
Regular Member
Join Date: May 2009
Posts: 50
|
Great writeup! I did this to jy TC 2 weeks ago. Got three of them off easyish, but the last one needed a bit more persuasion, so out came the 4 inch grinder!
|
||
|
|
|
|
23-01-2013, 02:55 PM
|
#5 | ||
|
Regular Member

Join Date: Mar 2008
Location: Sydney
Posts: 117
|
Nice tutorial. About to do mine. Ill keep this in mind.
__________________
My XY resto: http://www.cardomain.com/ride/2338743 |
||
|
|
|


 Linear Mode
